
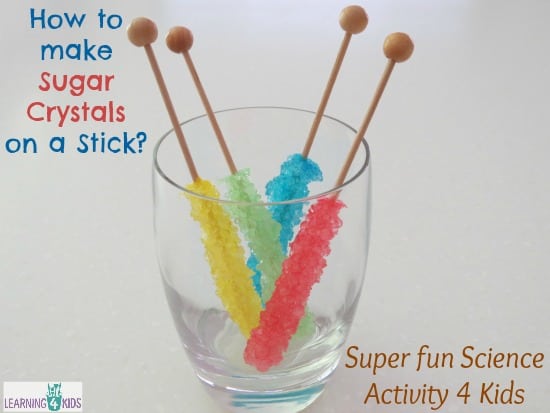
Making Sugar Crystals on a Stick are simple to make and the kids will enjoy eating the finished product. It is a great opportunity for kids to learn how different substances change when heated, cooled and mixed with other substances. Kids will be amazed to watch as the sugar crystals grow and increase in size over 2 to 3 days.
Full parental supervision is required with this activity as it involves hot liquids.
What you will need?
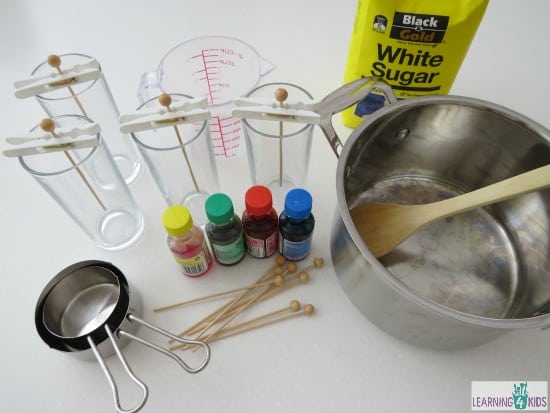
Ingredients
2 Cups Water
6 Cups White Sugar
Food Colouring
Extra ¼ Cup White Sugar
You will also need a saucepan, wooden spoon, measuring cups, pegs (optional) and glasses (or jars) for growing the sugar crystals. We grew our sugar crystals on wooden sticks that we purchased from a party accessories store; you could alternatively use pipe cleaners, bamboo skewers or straws.
Step 1
Setting up:
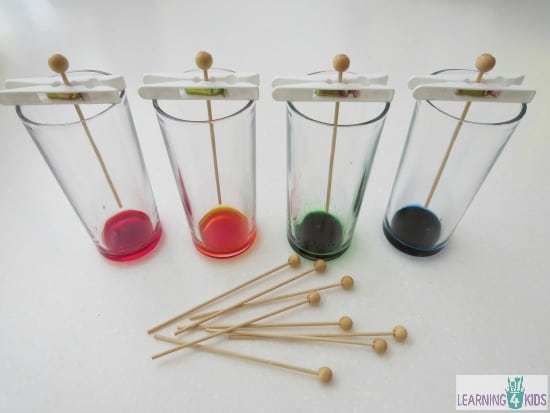
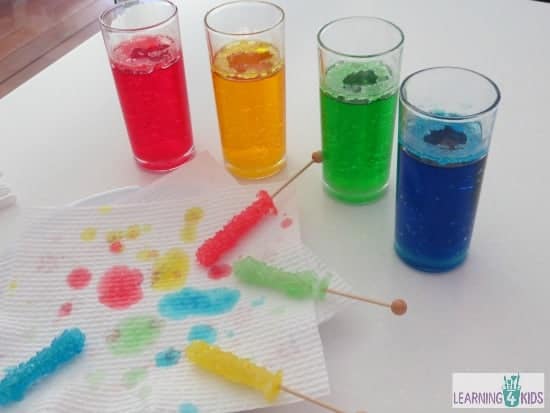
- We made 4 different coloured sugar crystals and set up 4 glasses, one for each colour. In each jar I placed 5 drops of food colouring, red, yellow, green and blue.
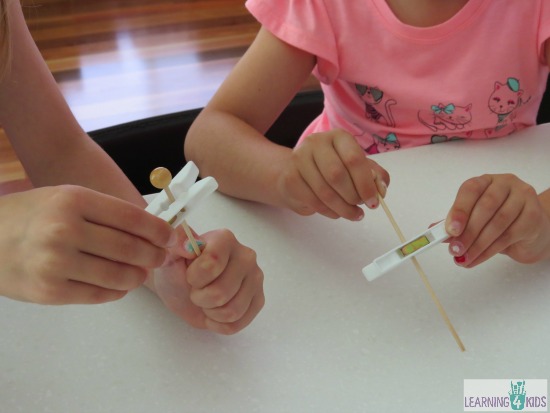
- The wooden sticks need to be set up on the glass so that the sticks do not touch the bottom or sides of the glass. This allows room for the sugar crystals to grow. We used pegs to clip onto the wooden sticks and balance them on the rim of the glass so the stick is straight up and down the middle of the glass.
Step 2
Heat:
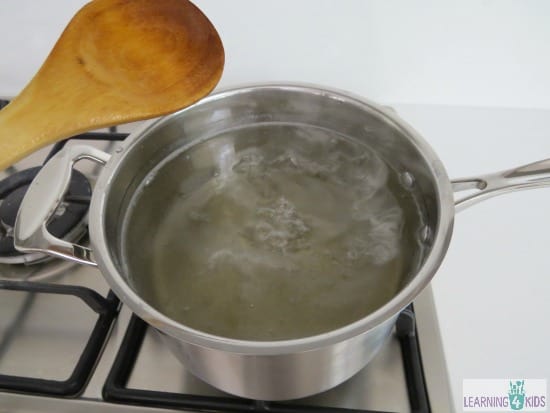
- Heat the water and sugar in a saucepan stirring constantly with a wooden spoon to dissolve the sugar.
- Stir constantly for about 1 min as it boils, then turn off heat.
Step 3
Pour:
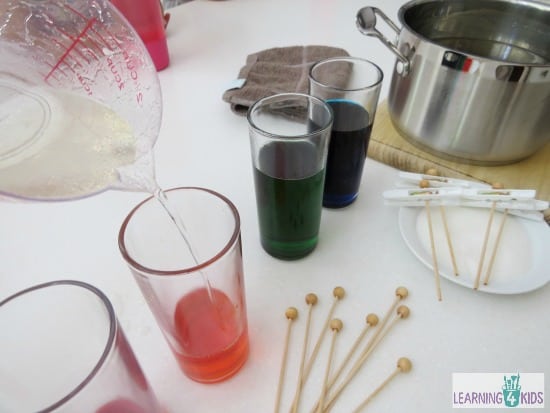
- Using a heat proof jug, pour sugar syrup equally into each glass and stir to combine food colouring with a metal fork. The sugar syrup is very hot, please be careful.
- Allow the sugar syrup to cool for about half an hour in the glasses before placing the wooden sticks into the liquid.
Step 4
Wet:
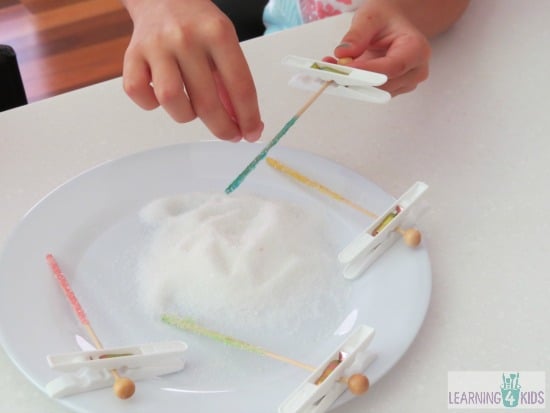
- Wet the wooden stick by dipping it into the sugar syrup and then roll the wet wooden stick into the dry white sugar. The dry sugar will help the sugar crystals attach and grow onto the wooden stick.
- Place the sugar coated wooden stick into the sugar syrup in the glass, making sure that it is not touching the bottom or sides of the glass.
- Set aside and watch the sugar crystals grow for 2 to 3 days.
Step 5
Dry:
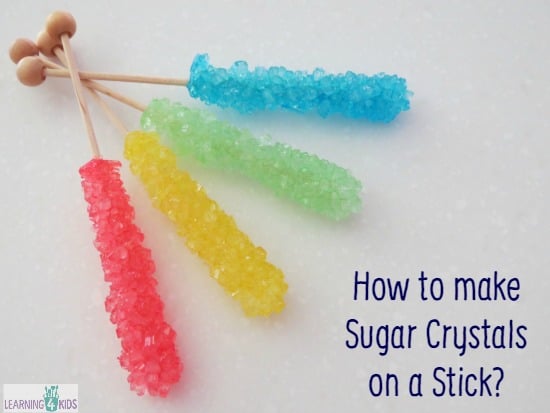
- On day 3, take the sugar crystals on a stick out of the sugar syrup, allowing the liquid to run and drip off before placing them onto a paper towel to dry.
Step 6
Enjoy:
- We took our sugar crystal sticks out of the sugar syrup after 3 days and allowed them to dry on a paper towel before eating them.
What the kids can do?
When doing activities with kids that involves hot liquids, it is very important that safety precautions are taken at all times. Even though there are some steps in the process of making Sugar Crystals on a Stick that should be only completed by an adult, there is still so much that kids can do to be more involved in this activity.
Here are a few ideas for involving the kids:
- Measure the sugar and water, and pour it into the saucepan.
- Count the number of drops of food colouring when putting it into the glass.
- Place the pegs onto the wooden sticks.
- Dip the wooden sticks into the cooled sugar syrup and coat them with uncooked white sugar.
- Take the Sugar Crystals on a Stick out of the sugar syrup and place them on the paper towel.
- Observe and talk about the changes that are taking place to the sugar syrup over the 3 days


Yours turned out brilliant! I did some blue ones for a frozen party and although they turned out okay, they were a bit time consuming. I think I might try your process. Plus it’s way better to do it for science because if something does go wrong you can question what did!
comam vegetais seus catraios
Can u add candy flavoring to this to make different flavors?
I have not added candy flavoring before but I cannot see why this wouldn’t work. Good luck!
When I’m ready to add the wooden sticks into the sugar syrup do I need put them in the fridge or just let them out on room temp ?
Hi Lesly, when we made ours, I left them out on room temp. I can’t see why you couldn’t put them in the fridge too, I am sure it will still work. Thanks 🙂
If you put them in the fridge it should take longer to crystalise but you should get bigger crystals. Why not experiment by putting them in different places?
Just wondering if the sugar syrup is reusable? Once we make our first set of sugar crystal sticks, can we use the same syrup and make more sticks?
Hi, great recipe. I was just wondering whether you can reuse the leftover sugar syrup to make more?
Curious to know if you tried to reuse the syrup to make more and if it worked?
im trying this out, n i seems to be working!!!!! yaaaaaaa!!!!!!☺😀 cant wait till i can eat them n share them with my family!!
I hope they work and I can put them in my tea!
I did not see a reply about putting it in the refrigerator, but I’m thinking that would not work. Growing crystals takes time. Cooling rapidly would not allow time for the crystals to grow. That would be a good experiment— to compare the two variables, rapid vs slow cooled.
I love the recipe. And just so other people know, if you don’t have one of those sticks you can use string instead. Just tie it around a pencil.